
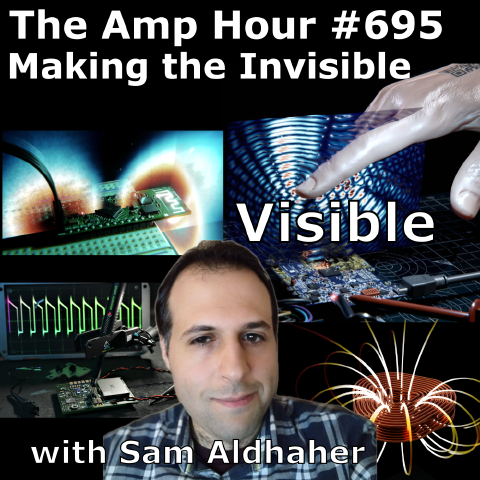
#695 – Making The Invisible, Visible with Sam Aldhaher
Download episode · 102 MB
Also on Apple · Spotify · YouTube · RSS
Show Notes
Welcome Sam Aldhaher, power engineer and 3D graphic artist!
- Sam has always been interested in art...and power engineering
- He primarily works in Blender and has been for 5-6 years
- Inputs and outputs
- Starting from Altium / KiCad for eCAD
- Blender doesn't accept step files, it works with meshes like STL
- KiCad -> Blender is a good flow, as there are add-ons to import KiCad
- Making a good visulalization is all about lighting, materials
- Building library of models
- Modeling magnetic fields
- Research in wireless power
- openEMS vtk format
- The marjority of tooling is glued together with python
- ElectroMag Nodes - Sam's tool - $1
- Right hand rule
- Developing intuition
- Elmer finite element solver
- Past guest Katerina Galitskaya also visualized RF and talked about the differences of testingi n a chamber vs building a visualization
- FastHenry is inductance tool that was created in 80s at MIT for wirebonds. Didn't have a visualization front end, like SPICE
- 3D whiteboard
- Using Blender to prototype and then taking it to other tools (CST, Ansys)
- Validating on the bench with an impedance analyzer
- Simulating power loss is difficult
- Quality factor
- "CAD is too perfect"
- Adding surface imperfections
- Node system is similar to simulink, adding blocks (Chris also thought this sounded like the effects in Davinci Resolve)
- Lighting
- Making the background dark means you don't need to have far field details
- Tutorials
- Blender Guru - how to make a donut
- Sam's video about how to draw components on a PCB in Blender
- Doing the same with Geometry nodes in Blender
- Ability to create things procedurally
- How to create ICs in Blender
- Using LLMs for python glue code
- What is a shader?
- HardOps tool, simplifies workflow (shuffle button)
- Visualizing an Inverted F antenna in Blender
- Remembering that videos are just still frames in order
- Electric fields propagating on the antenna itself
- Radiated electric fields (red and blue and black)
- OpenEMS generates GBs of data
- Blender geomtry goes out to OpenEMS so it's geometrically linked
- What if it was a ceramic antenna instead of a metal inverted F?
- Simulating 60 GHz from a radar chipset
- Meshing - sample points in space
- simulating points in time
- Impacts of stubs / squares on microwaves
- Human Hand Interaction with 60GHz Electromagnetic waves
- SAR simulations - how much heat do you generate
- Simulating motor windings on a PCB
- The above was a collaboration with past guest Carl Bugeja
- When to switch from near field (electro) vs far field (openEMS)
- Calculating values with inductance calculator
- FastHenry tool on Github
- Sam's work on artstation
- ZS smart watch
- Fast track if listeners want to get better at this art
- Learn blender - donut
- KiCad -> Blender reference
- Play with geometries nodes (ElectroMag Nodes, Fast Henry)
- Find Sam on social
Transcript
Sam Aldah: This is The Amp Hour Podcast. Released June 3rd, 2025. Episode 689. Making the Invisible Visible with Sam Aldar.
Chris Gammell: Welcome to the Amp Hour. I'm Chris Gamel of Contextual Electronics. Hello, and I'm Sam Aldar, and I'm a Power Electronics Engineer and a 3D graphics designer. Welcome, Sam. How are you doing?
Sam Aldah: I'm very well, thanks. Chris? People probably know your amazing animations from LinkedIn and Twitter slash X and other places, YouTube. And I have been a huge fan just watching the Invisible become visible with you and Blender and the tools you're creating. So thank you for doing that. It's very, very cool. Thank you very much. It's my pleasure to be on your show today. Thank you. Yeah. So where should we start? I mean, there's so much invisible in electronics. Yes. And you are making a lot of it very visible. I think one thing I guess we should start with is that we are going to be trying to talk about a lot of things that Sam does make visible. But ultimately, people are going to have to go click on links. I think that's really what it comes back to, right? Correct. Yes. Yeah. If descriptions would have been enough, then none of this would have been as cool as it is. So we will have links for everything. But people should be prepared to go click on them. Maybe we start with how you got started doing this sort of thing.
Chris Gammell: Yes. So I'm a full-time electronics engineer. And one thing, I also like art. So I always say to people, if I did not become an engineer, I would have become an artist. I will always enjoy drawing pictures, animations, and creating this sort of graphics. Thanks. I've realized that us engineers, we do fantastic work. We build amazing products, great designs. But I think most of us struggle with how we present our work to other people. I think we always assume that everybody would understand immediately what we're trying to present. So I figured if I could sort of, I'm working on really exciting technologies, and I'd like to present them in a way. I'd like other people also to be excited as I am about it. And I thought, if I could present it in a better way, in a more unrealistic way, that would go a long way in helping people understand my work and selling my idea. So I started during lockdown, basically, to learn how to create digital art, 3D graphics. And my favorite tool is Blender to do all of this work, simply because it's open source, available for free, and lots of resources and tutorials online. And so that's how I started, basically.
Sam Aldah: Not the easiest one. I remember people were talking to me about it. I think as I was getting into 3D modeling, I was kind of asking questions online. People said, oh, well, Blender's another resource that's out there. Because I think the tool I was using at the time didn't have a great renderer, but Blender does, obviously. So you could export a step file, put it into Blender, make it look much, much better, much more realistic, that sort of thing. What was that process? And also... Picking that up and starting from... I guess Blender has been improving as well, like many open source programs.
Chris Gammell: It has improved a lot over the years. And I've been using it for over five, six years now. And it was difficult at the very beginning, but I think the developers behind that, they've made enormous changes. And it's become very easier to learn than it was before, that's for sure.
Sam Aldah: Yeah. And then what about the target audience for Blenders? Is still kind of the digital artist animation, things like that? Or does it have a technical bent kind of in the direction you've been taking it?
Chris Gammell: So Blender, the target audience for Blender is just, yeah, gamer, game designs, animations, cartoons. It was never engineering. I don't think there was a huge engineering audience for Blender. Okay. So that's sort of where I thought, okay, well, there's a gap. There's... I could now, you know... Smoosh it together. Yes, exactly. Yeah, yeah.
Sam Aldah: There you go. Peanut butter and jelly. All right. I guess that's the US thing more. In the UK, they don't do as much peanut butter, I hear. So I don't know why. Marmite. Marmite. I have tried Vegemite. I have not tried Marmite, but Vegemite is enough to scare me off that I'm like, I probably could leave Marmite behind.
Chris Gammell: I think they're... Yeah, it's either you love it or you hate it. Yeah.
Sam Aldah: Yeah. I'll probably... You know what? I'll come to the UK. We'll hang out. I'll have some Marmite. How about that? Yeah. Okay. So then what did it take to start doing this sort of thing? Like what is... Maybe for people following along and maybe thinking about doing this at home, what... Right. I guess let's start with the good now, right? What is the best flow method now? And then maybe we can talk about the... If it's relevant, what it was before.
Chris Gammell: So how to use... How to learn it. So... Yeah.
Sam Aldah: Like workflow of like you go from 3D CAD to there, or you start in Blender, or like where... What are the inputs and outputs?
Chris Gammell: So I think, you know, if you're designing a circuit board, a PCB, you know, if you're using Altium or KeyCAD or any other tool, you're sort of... You already have that 3D capability there built in. So that's sort of where you might be able to start. Okay. You have a reference image.
Sam Aldah: Yes.
Chris Gammell: Okay. How it looks like in CAD. So, you know, you've got your circuit boards, you've got some cylinders, which are capacitors, you've got some cubes, which are resistors. So you have this sort of initial idea in your mind of how it might look like 3D. Okay. And then you use that as a reference to then, okay, we create that in Blender.
Sam Aldah: Oh, really? Okay. So it's not like take a step file input. It's like start from scratch?
Chris Gammell: Yes. So unfortunately, Blender is not a CAD tool. So it doesn't accept step file. It's a mesh tool. So basically, you've got points in space that you move around and you create edges and planes. So that's sort of the first sort of hiccup that people will encounter. Okay.
Sam Aldah: How do I... Don't turn it off yet.
Chris Gammell: There is hope. No, no, no. Exactly. And that was the first issue that I encountered because I was expecting, yeah, okay, I've got my step files of components here and there. I can just drag and drop them in Blender. No, we would not accept it. Okay. You have to convert it to a mesh. So like STL files, OBJ files. Okay.
Sam Aldah: So maybe even like a key CAD to free CAD to STL. Would that work?
Chris Gammell: Actually, key CAD is one of the only tools out there that would export directly to Blender as a mesh file. So key CAD is fantastic. All right. So in fact, people have actually created Blender add-ons, which allow you to directly import your key CAD design on your project with the 3D models and have it exactly appear in Blender as it is.
Sam Aldah: Wow. All right. Oh, it's now possible to do that. Open source. Open source. There you go.
Chris Gammell: Yes. Yeah. Okay. And then it's up for you to add the lighting effects and the materials and the shaders and everything else to it. Yes.
Sam Aldah: So maybe we can define some terms. Well, actually, let's keep going with flow. And then I'd like to define some terms. Right. Yeah. Yes. Okay.
Chris Gammell: So yeah, as we said, you start from a reference image. And yes, if you might be able to import your, let's say you import your key CAD project into Blender because you can do it now. And then from there, you can build on it. You can move objects, manipulate objects, add some lighting. It's all about the lighting. I've realized to make your animations and images look really good. It comes down to the lighting. And so you'll probably be spending a lot of time just getting that done right. I always struggled with the lighting and the shadows. Also, materials. You need to spend some time to learn how to create the materials and the shaders because the basic CAD materials, they're very basic, either like simple colors.
Sam Aldah: Yeah.
Chris Gammell: But you can take that a step further. You can add some roughness to it, add some shine, add some dirt, add some surface imperfections. Got it. So that's, you can then learn how to do these things.
Sam Aldah: So I mean, there are some other capabilities. So like past flows that I've used was like key CAD to step, step into fusion. Fusion, then you could also add material types. And I think it would probably be approximating the same methods of adding material properties, right? Exactly.
Sam Aldah: Yeah. Okay.
Chris Gammell: So yeah, that's sort of the processes.
Chris Gammell: If you start in key CAD, import, export to blender, and then you could, and it's just simple as that. That's just, that's, that's the whole process really straightforward.
Sam Aldah: And, and do you, you know, so you have these libraries of, you know, I'm just looking at your YouTube channel. Again, we'll, we'll link all that stuff in, you have, you know, kind of these designs that you've, you've worked on over time. Do you kind of export just a cap and then use that cap over and over again, and then like just a, you know, QFM or do you, do you do whole designs and then apply, you know, material types to each, each surface?
Chris Gammell: I started with sort of exporting, you know, with, with, with CAD files, you know, and then convert them to SDLs and into blender. So that's how I started. But then I've realized CAD is very perfect. CAD is too perfect. You know, it's, it's, it's, it's not, it's not really realistic. So then I actually, okay. I, I then make some changes. Like if I have a capacitor, I would, okay. Import that as it is, but I would make changes to it. It, such that it becomes a little bit more realistic. At so, but then ultimately I realized, you know what? I might just start from scratch and do the whole thing in blender.
Sam Aldah: Yeah. Right. So that would be like the maximum control for each, each surface.
Chris Gammell: Exactly. Yeah. So I've, I've over the years, I've built my own library of blender created models, all done in blender. Okay.
Sam Aldah: Yeah. I think it's probably going to come down to how, how much each person listening wants to try to, you know, I, we probably should. We've already talked about easy path is key head to blender. That's great. So now you'd have a board that doesn't look as realistic as Sam's, but might be able to layer some of the interesting things on top of it.
Chris Gammell: Exactly. And you can make some changes to it and modifications that I think that might be the, but I would expect most people would go down that route because yeah, it's a, you know, you've got something already there to work with and to make changes to. Yeah.
Sam Aldah: So then before we get back to the, some of the terminology and stuff like that, you obviously layer a lot of other interesting things on top of it as well. So things like magnetic fields, what is the, what's the tooling there? Yes. Right.
Chris Gammell: Okay. So now we go a bit more sort of a bit more advanced, a little bit, a little bit more, we take a step further. So, um, part of my research, uh, it was in wireless power and wireless charging. And that involves a lot of magnetic fields and we, we, we don't, we can't see those magnetic fields. We can, we have solvers and simulation tools. Yeah. But then I thought, okay, I've, I've got my board design. I've got my coils in blender. They look great, but there's also something missing, which is the magnetic fields. I want to show those as well. So I've, I've, I first started by, okay, I've, because I use other tools in like a professional tools to solve for magnetic fields. Like for example, ANSYS is a famous one, CST, FEM 2D is another tool. So then I've, okay. I thought I'd like to then export my simulation results from those tools and extract the data from those tools and put them into blender and visualize them on top of my actual PCB design. Uh, so then the process for that actually is not straightforward, unfortunately, uh, because each, each solver has its own way of generating the data, how it stores the data and exports it. So for example, um, tools like I've recently used, um, open EMS as an open source tool for antenna simulations. And, and that, because it's open, open EMS, it uses sort of a, a, a industry standard or, uh, uh, uh, to, to, to store the results. And it's, it's a VTK format. And so then you can then import that data into, uh, blender via Python. Okay. So, so. A lot of, a lot of glue code involved. Yeah. A lot of code. Yeah. Nice thing about blender is cause it, it, it, it's, it's got a Python console in it. So then you can write, if you know how to code a little bit and so does key CAD and so does open EMS. So then you can essentially link all those tools together with just Python code. Um, and so that's, that's how, how, how then I bring that data from all these solvers into blender where I then spend a bit more time to visualize them and add effects to them. So that's, that's how, how I used to do things. And, uh, but then I realized, okay, well maybe I can simplify this if I can do the whole simulation itself and the calculations within blender. I can do that. What, why? Well, it runs Python. I can just run Python code for solvers. Um, and as you can see, and, and, uh, and then those screenshots there. Um, and. Uh, so I started to create my own solvers within blender to solve for the magnetic field. And it's very limited. Of course, it's not the same level as the professional tools, but for sort of, sort of basic simulations. And just to, you know, if you, if you've got a number of ideas and concepts you'd like to try, uh, for designing coils, for example, you could use, use the blender tool, uh, which I, which I released it. Uh, just called, um, um, um, electromagnodes. You can use that to visualize magnetic fields and electric fields as well. It has its own limitations, but then, and then once you have a design that you're happy with and you think you can take it a step further, you can perhaps then go back to your professional tool. Yeah.
Sam Aldah: Well, I mean, for it, the, do you charge for electromagnet nodes or no?
Chris Gammell: It's electromagnet nodes. It's, uh, actually the free it's, it's free. It's, uh, it's for $1. It's for $1. You can get it for $1 and you can get it for free. I think on gum road, the reason why it's $1, because I can't put it, I can't set the cost to zero on these, uh, on these platforms.
Chris Gammell: So that's why it's $1. Yeah.
Sam Aldah: Yeah. That's, um, but I, I'm just comparing it with like HFSS and like answers and like, just like one dollar. So like, literally if it's a dollar, you can have a, you know, it's, it's obviously expensive for the other ones. Absolutely. Yeah.
Chris Gammell: Yeah. It's, it's obviously not the same level as answers and you probably will not get, but it's just, like I said, for static magnetic field calculations, electric field calculations.
Sam Aldah: I mean, I think right now for the listening audience, I'm thinking about myself, but let's be really honest here. Uh, I'm looking like, what is the lowest, like if I go to answers and I'm like, Hey, I just want to try it out. They're like, Oh, sure. Whatever, buddy. You know, you're like, talk to our salesperson, prove out your business case, and maybe we'll give you a 30 day license. And then you can figure out how answers works. It's like, no, I literally just want to try it. This is, so this is the path. So that's great. You know, that's, yeah. Yeah.
Chris Gammell: Yes. Um, I've also recently got some interest from, uh, a university in the, in the U S, uh, where they're trying to now use electro-match. Note, uh, these tools to model, um, um, stellarators in for nuclear fusion. Wow. Which I found quite, wow. This is quite something big for, for, yeah. Yeah.
Sam Aldah: Well, they have big magnetic fields too, right? Exactly.
Chris Gammell: And it's all, uh, DC fields. So static fields. So, you know, the actual calculation is actually straightforward. Cool. For those.
Sam Aldah: That is very cool. Well, that actually brings back one thing that you and I were talking about before the show, which is just like, so, you know, we've been talking about all this stuff. We're going back to the technicals of how it's done. But just that this is so useful, like so, so, so useful as a student, as someone who, you know, as making the visible, invisible visible. Like I just. Yes. And I think there's trouble in school thinking about this stuff and now being able to see it is so useful from a learning content. Absolutely.
Chris Gammell: Yes. Yeah. I've heard that as well from many other people as well, you know, this, if we, we, like they, we said, we wish we've had those tools back when we were studying. Yeah. Yeah. Yeah. Yeah. Yeah. And I think that's one of the reasons why I also want to make this a bit more educational for people as well, just to get more people, you know, to, to, to, to, like I said, to see the, the, to, to make the visible, to make the invisible visible visible. Uh, and just to help them during their studies, you know, cause you know, I remember, I think you said for the show is that, you know, yeah. You're like, okay. Use the right hand rule to. Right. Visualize imagine the magic field. Yeah. Okay.
Sam Aldah: Right. Sure, buddy. Right. Yeah. Yeah. Can you maybe show me on screen? And they're like, well, we can draw, you know, then they, they go on the board and they try and draw 3d, you know, 3d on the, on the chalkboard or whatever. And it's just like, yeah, nah. Yeah, exactly.
Chris Gammell: Yeah. And, and, and also because now it's, it's interactive. So, okay. Right. What if I change my coil? What if the coil winding has changed a little bit or have a turn here and you can see the results straight away. Right. And, and, and that really helps you understand what's going on. I think. I think so too. That interaction.
Sam Aldah: Yeah. I think honestly, one of the, one of the most, so I, I think I've talked about on the show before, like one of the most useful things in my learning journey was actually sitting with. With analog engineers at Keith Lee and just them helping me develop intuition.
Sam Aldah: It was like, okay, let's talk about, let's talk about some of the formulas, how they interact, how some of the, you know, D I D, you know, V equals L D I D T. Right. These kind of like mantras and like building that sort of thing. And just like being like, okay, well the current is changing. So the voltage, you know, you have inductance, you have current changing. What's going to happen. The voltage is going to change like that developing of intuition. This is kind of doing that same thing for RF and like short circuiting it because again, it is visible.
Chris Gammell: Absolutely. You know, absolutely. Yes.
Sam Aldah: Which direction, which, you know, how does it like, so one of your things here is like a human hand interacting with electromagnetic waves. Like ain't no, ain't no formula. Let's tell me how to do that. Like you need a simulator in that case to, to make exactly. Yeah.
Chris Gammell: Yeah. Yeah. So, and that's why I love blender as a tool because it, yeah, it helps, helps you with that to, to gain that intuition, to gain that understanding and having a good visual to go with it really could goes a long way. Yeah. I think, um, How do you know it's right?
Sam Aldah: Cause so like, I'm going to look at your stuff, Sam, and I'm gonna be like, yeah, this is right. I don't know. You know, like, how do you actually verify it? Like, how do you make sure it's actually correct?
Chris Gammell: Um, for the, that's a good question. So I, I actually do a comparison with, uh, like a professional tool. So, um, I've been also using open source, uh, solvers, such as Elmer, uh, a fire element solver Elmer. And so I, I kind of do a bit of comparison between the results that I get and, and with, with Elmer and yeah. And then, so if there's any limitations or differences sort of, I can go back and change things. So, um, yeah, I think I asked the same question to Katarina when she was on the show.
Sam Aldah: So she was on the show six, seven, eight. And we choose, she also does simulations of antennas and stuff like that. And, and, uh, a lot of the same kind of stuff. And it's just like, I don't, you know, it's because it's invisible, you know, I, right. Yes. You have to do it empirically. Basically at some point, you know, you have to have some real world feedback.
Chris Gammell: Absolutely. The, the, uh, uh, also I've been sort of relying on, um, instead of my videos that I've been doing about calculating inductance of, uh, wire bonds and semiconductor packages. So I've been sort of looking at what's being published online on papers and journals, because they've done the measurements for their, uh, for, for their sort of package and their device. And they give you a number for inductance. Uh, and so, okay. I go back to my tool, uh, like for example, the blender, the fast Henry tool that I've been working on. Oh yeah. I go to, I use that tool and then, okay. I get a result assuming I've managed to replicate the geometry, you know. Yeah.
Chris Gammell: Approximated close enough sort of thing. Exactly. Yeah. And then I, if the, if my numbers are within the same ballpark. Yeah.
Sam Aldah: And so, so fast Henry is another tool that you have. So there's electromagnet nodes and fast Henry. So, so fast.
Chris Gammell: Yes. So fast Henry actually is a tool that was developed in the perhaps late eighties, early nineties, uh, from MIT, an open source tool. And it's, it, I think it, back then or the nineties, it used to be the, the industry sort of gold standard for, for simulating semiconductor packages, uh, bar bonds, uh, lead frames, inductors, coils, all of that. Um, it's sort of now less, you know, uh, over the past year. It hasn't been used a lot because simply it all comes down to how do you create the geometry to start with. That's what it comes down to with all these tools. It's just creating the geometry. And then, uh, the, the, the, the, the math behind all these solvers is all the same. Right. Right. Right. Right.
Sam Aldah: Right. Right. Uh, in turn in turn in turn in turn in turn in turn in turn in turn in turn in turn in turn in turn in turn in turn in turn in turn in turn in turn in turn in turn in turn in turn in turn in turn in turn in turn turn in turn turn in turn turn turn turn turn turn turn turn turn turn turn turn turn turn turn turn turn turn turn turn turn turn turn turn turn turn turn turn turn turn turn turn turn turn turn turn turn turn turn turn turn turn turn turn turn turn turn turn turn turn turn turn turn turn turn turn turn turn turn turn turn turn turn turn turn turn turn turn turn turn turn turn turn turn turn turn turn turn turn turn turn turn turn turn turn turn turn turn turn turn turn turn turn turn turn turn turn turn turn turn turn turn turn turn turn turn turn turn turn turn turn turn turn turn turn turn turn turn turn turn turn turn turn turn turn turn turn turn turn turn turn turn turn turn turn turn turn turn turn turn turn turn turn turn turn turn turn turn turn turn turn turn turn turn turn turn turn turn turn turn turn turn back to education again one more time right yes like when man if a teacher could have been like hey we're going to talk about the geometric equations here that drive some of this stuff down the line and then they could have shown me this and been like sam does this sam does this in his program right you might want to do the same thing too look at all these things sam has done and all the things you can do with it like just being able to draw that line back to it man i
Chris Gammell: would have paid so much more attention you know oh yeah yeah yeah yeah yeah no it's actually quite quite cool you know i i also get some messages from you know back in my videos oh you know like your videos have you know inspired us to do this and to do that and it's it's it's really really
Sam Aldah: nice to hear that yeah great great well hopefully more after this after this recording i think that's the other thing too is like people are going to keep finding this over time you know it's like it's this cache of of interesting things and i mean hopefully people are going to find it and be like oh wow sam's even further along and now i you know like the fast henry tool is available the the the the electromagnodes is available that sort of thing so yes so then fast henry is another
Chris Gammell: blender plugin or how does that work it's it's a yeah it's a it's a blender plugin and um it's so basically if a fast henry the the tool exists as a solver but what i'm doing is integrating it within blender because i want to use blender's powerful capability to create geometry and so i've realized okay i can create geometry blender but then i have to export it and to a text file and then call fast henry how about i just use well python again back to python i've got python blender i might just run everything within blender so what happens is i you create your geometry in blender you run fast henry within blender so it calls fast henry in the background for you yeah and then the results are then displayed back within blender so it's a one single button solution got it one push
Sam Aldah: so fast henry is like uh so like much like spice by itself was like a berkeley command line tool that like you had to put in all your names and stuff like that but for me it was useful when someone's like layering visual on top of it and yeah or and actually another thing i was thinking about with your um the uh electromagnodes you know you said it's simple but like i still choose like false dad simulator which is like this you know javascript applet right i don't need anything fancy because of the visualization like that's the part that's actually useful to me you know intuitive context the also the
Chris Gammell: other reason why i i sort of i wanted to integrate all of this business because i'm now actually using these tools in my full-time job to design coils design packages and i i want speed i want to be able if i've got a number of ideas a number of concepts so uh it's becoming blender like it's basically it's a 3d whiteboard where you you sketch your geometry okay okay okay okay and then you can run a simulation quickly to to see what the inductance is and the impedance look like okay it's not quite what it's not quite what i want it to be and then you make changes to geometry very quickly you run that again so it just speeds up that design workflow very very quickly and then of course once you've got a design that you're happy with you might say okay then i can take this to a different tool
Sam Aldah: more professional tool to got it okay yeah so this is like the this is the clay molding this is the the prototyping that sort of thing interesting yes exactly yeah yeah and then what are some of the tools that you will like so upon the you know finding the 80 you know the pareto 80 good enough kind of solution then where do you take it to refine it just in in your professional context
Chris Gammell: and uh yeah so i'm trying to uh move away from commercial tools and again back to open source tools and i think they're becoming more powerful so i'm now sort of experimenting with elmer a little bit more it's also an open source um uh it's an open source fire to animate solver um and so i'm trying to spend a bit more time experimenting with that and my plan in the future is to also integrate elmer within blender as well so wow i think that's that's sort of my next big project i'll be working on but sort of that's sort of how my workflow is is to then take it to another tool like elmer in some cases cst um in other cases ansys for a bit of thermal simulation so as much as i am a big fan of open
Sam Aldah: source like i get it that like a lot of the you know like someone's like comes to me and they're saying oh i want to use keycad but you know my company uses altium i you know we use whatever the other ones that are out there and it's just like but sometimes the other offerings that are part of it or like you said the you know just the the professional proven nature of it is that's what you're often paying for it's like no this is like there are scientists they're proving proving this physics over and over and over again and that yes and you know open source tools have caught up which is great but being able to go external is is very useful and it might be faster and a better solution despite the
Chris Gammell: cause it is yes despite the cause and because it kind of i think people would trust them a bit more i think yeah trust it would trust the results a bit more from these professional tools and obviously they spend you know these companies spend a long a lot a lot of time investment and money to make their tools sort of you know not is it perhaps is to use but if you if you to minimize the mistakes and errors that a user could could do when inputting the simulation data yeah and i think at the end of the day we're
Sam Aldah: really we're really replacing the the true physical prototyping process because you know like you're going to prove it in a real world environment you're going to build a prototype you're going to put it put it into a chamber you're going to do all this testing on it and it's like you know even a fifty thousand dollar tool is cheaper than that right and so you're trying to like just shortening that cycle over and over again yes yeah and then so when you're doing these coils and stuff like that you're also validating validating going through you know kind of increasingly complex tools but then you are also then also building physical prototypes and validating those on the bench absolutely yes so
Chris Gammell: yeah we i built we built the coils uh and we test them uh we you know we use the impedance analyzers vnas and and see how close our results we interestingly we always find like if we're building the coil for a a wireless charging application we always find that the inductance is pretty much correct to what we get in simulation okay but the resistance of that coil is always off by factor of two or three tons sometimes really and yes it's it turns out well it's actually a very good because um simulating and and and measuring um power loss is actually very difficult and getting that getting that accurately calculated is very difficult it comes down to the mesh how fine your mesh is and there's only a number of subdivisions you can make on the mesh uh before you um your laptop or your computer says i've had enough starts on fire
Sam Aldah: yes yeah or you go to like some super cluster and the cost isn't worth it right yes yeah exactly yeah two to two x though that's really that's higher than i would but is it because it's a much lower resistance overall like i in my mind i'm like oh like one kilo ohm versus two kilo ohms but maybe it's 0.1 ohm versus 0.2 ohms yes and so it's not that different in the physical sense it comes down to
Chris Gammell: the difference between the how how big is your inductance compared to the resistance so uh it comes down to the quality factor uh so the quality factor is uh frequency uh omega times inductance over r if if that number of frequency times inductance is very high compared to the resistance it's it's actually very difficult than to to calculate the resistance accurately um because yeah it's because essentially it comes down to a numerical um rounding error i think um times all the mesh points as well and like
Sam Aldah: how that kind of exactly gets through the system well that is really i mean it's fascinating that you're able to you know feed this stuff back and like you're building your own tooling which is incredibly cool uh and uh yeah and i think we're all we're all benefiting so that's really cool how much does does the rf stuff kind of play into it so you mentioned the inductance stuff all this stuff you're also doing the open ems and the you know some some of the things i'm looking at on your youtube channel are also like you know we're up in the giga 60 70 gigahertz like wow yes that's yeah yeah that's
Chris Gammell: opening yes at that point that is open still open ems yeah so with this 60 and 70 gigahertz that's just me pushing my sort of uh because i i work in the low megahertz region in the hundreds of kilohertz and i've always wanted to kind of explore i understand a bit more about 60 gigahertz or as you go to rf and high frequencies and just understand that a bit more so i wanted to see how high i can push it and yeah i can go to 70 gigahertz even more yeah well given fourier stuff i guess even your you
Sam Aldah: know 13.56 megahertz is probably has some gigahertz component it's just very very very small yeah yeah yeah the way it goes okay so we were talking about you know to get back to the the blender stuff so now we kind of talked about the different plugins you use how you how you tie all this stuff together now let's if we could get back to the the shading and some of the the um right some of the technical know-how within blender as well again people probably have to try it out to really dig into it
Chris Gammell: but i i i uh as mentioned is i think cad is too perfect okay uh it's very clean uh but that's not how the real world is and so i always like to add something what i call surface imperfections like if you if you have a if you have your pcb you know if you just built the pcb yes and come out come out of the assembly line and maybe you've you've held it in your hand over time it starts to build up smudges and dust collects on it so i also wanted to capture that detail as well wow really just to make it look you know absolutely realistic in some way so it was i did that in my very early work i was just putting scratches and dust and even in the air as well uh floating particles and i don't know of that stuff but um uh yes um creating the materials will will will it's not um easy at the start and you'll have to spend a bit of time experimenting with blender's massive node system so blender uses nodes okay um to create um uh to create the material so you can add uh uh lighting effects you can add displacement you can add you can add bumps um so many things it's it's massive um if if you've ever used simulink in matlab yeah simulink was quite popular too so blend is that kind of kind of a similar setup to that if you think of it's a similar setup where you have these sort of blocks of um either like you have an amplifier block or a transfer function block and you sort of link all of these blocks together so blender is quite similar to that with this material system where you have all of these individual nodes that's what it's called and they all have certain different functions and sort of then you could link them all together and create your the effect that you want for the for for the materials um yeah da vinci resolve kind of has that for their effect system yes exactly yeah very similar to that to that concept in da vinci resolve so that's for the materials and yes you'll spend a lot of time trying to get the materials done right um as i mentioned then it comes to the lighting i think the lighting is really important and that's where because if you have a if you have a dark scene no matter how much how much realistic your material is it won't show up because there's no light on it so you need to spend a bit of time on on the lighting as well uh for it and with blender there's different ways of doing the lighting you you can either insert like a point lamp or you can insert a sun in your scene oh really yeah yeah
Sam Aldah: i have very crude controls of that in the the keycat simulator but i really don't play with it i just kind of like all right well click on the you know the more realistic thing and that's the best i can do
Chris Gammell: yes so yeah i think keycat has sort of like it's on default setup of lighting yeah okay this how
Sam Aldah: is it like 60 degrees above the plane that sort of thing exactly yeah standard stuff it's um problematic sometimes because you it doesn't like the back of the board sometimes it's like okay that's yeah
Chris Gammell: yeah uh one thing i've struggled with blender is if you have objects that are sort of color is a bit dark and black it's kind of difficult to make it appear okay look good uh that's what i've struggled with sort of the very dark colors um so what i've actually did the update i've made my my backgrounds dark and so that all my pc are bright and i'm sort of you see all of my images i only only on my uh videos and images you see all the uh the background is usually dark and the actual peat boards you know because that makes the the your board stand out which is i stand up yeah and then you don't have to
Sam Aldah: render the far field either right you don't have to like have exactly you know full desk set up it's like no no no this is in the foreground that sort of thing okay how would you recommend people learn learn the lighting piece of it is it like uh tutorials or do you have any tutorials or anything
Chris Gammell: yes so so actually uh you know i've always been asked if you could make a tutorial but then i would say there's a huge number of tutorials on on the web but and they do a far far better job than me in explaining it well my favorite tutorial is uh from a guy called blender guru he if he guru yeah he does the famous blender donut tutorial basically how to make a realistic donut donuts how to make a realistic donut in blender and he goes through all the basic tools and functionality and how to and the lighting and the materials and the nodes to do that so that's what i would recommend for people to to to watch those videos yeah okay and i'm i'm looking through your yours here and it looks like
Sam Aldah: you have some about the you know the stuff we talked about earlier drawing components on pcbs putting geometry nodes that sort of thing so you have you have some tutorials in that space it seems like
Chris Gammell: i've got some sort of just simple demonstrator videos uh on it they don't go into the details of how i do it i've i've it's just a matter of finding the time really to to do that yeah um but one thing blender has got a very powerful system called geometry nodes um and that is i think one of the greatest additions to blender it's a allows you to create procedural objects and and and because blender before that was a destructive uh design process where where you would okay if you if you add in a a cube in your scene and you change that cube size that's it you can't really go back to the original size got it and but now with geometry nodes you can make things procedurally so it's becoming a little bit like cad you could say but it's not really cad but it's procedural uh and the lovely thing about procedural is that then you could create um create uh design groups uh where then you could perform bigger functions because it's all procedural and you just type in a number okay i want to change the dimension of the of the the the ic's pin length but i want you to change them for all pins not just one pin but at the same time if i change the pin length also make the ic body a bit bigger as well and so you can sort of cascade all of these things if you make one change it cascades to the to bigger bigger bigger changes um it sounds like that also makes it more scriptable as well so when you're more scriptable and again if you include python with it with the mix you just have a very powerful modeling capability um you know when i hear python
Sam Aldah: these days too you know with all apologies uh i i hear um hey you know who's really good at python not me uh the llms are and so like it feels like that you know being able to lean on that sort of stuff too for when i when i get stuck in a corner instead of like yeah you're like oh i wonder if sam's available
Chris Gammell: it's like no no i can ask a yeah and and i've i've actually because you know i've i've never really uh you know i've just recently started to learn how to how to code and write python and other nc and c plus plus i didn't know any of that so you know i actually find like these tools chat gpt they helped me help me a lot to learn i had to make changes to like i would not just take the code as it is and run it yes although it would work but i still want to make changes to it um i actually find yeah find i found those tools very very helpful in creating all my
Sam Aldah: my my projects awesome what about uh so we talked a little bit on the some of the the lighting terminology you had mentioned as well so like shader like what is the shader uh the shader is
Chris Gammell: uh how it is the part in blender where it creates the material oh okay so that's actually referring not
Sam Aldah: shade not just how it creates shade it's like it's just how it renders a surface the material
Chris Gammell: yeah exactly how it how it how it how it visualizes the surface the colors how it how the light reflects on it uh if it's a metallic surface or not so that's that's what it's called the the shader part of blender yes yeah it might be a bit confusing because you might oh shade shadows yeah
Sam Aldah: i was thinking shadows and we're talking about lighting that sort of thing okay no yeah because well and also like a casting of light around objects too right so like you might have one smaller object in the in the shadow of another object so then there but maybe i don't have to think about that which would be the best case scenario for me yeah yeah it's it's uh sometimes but the the
Chris Gammell: the challenge i had because with pcbs are very small and especially with pcbs if you've got like a big capacitor and you've got a tiny surface mount capacitor next to it or an ic the shadow of that capacitor will not make those small components visible so you might then have to add a second light source on the back to kind of put some light on these components but if you put too much light it starts to become
Sam Aldah: too bright and too shiny oh it's it's yeah yeah it's a lot of uh tweaking it sounds like a lot of tweaking and
Chris Gammell: yeah i've i've found um some some some some uh tools out there you could you could purchase um one of my favorite tools to speed up this workflow is hard ops uh hard hard ops um ops it's uh uh yeah ops hard ops um because with blender i think most people will find it hard to learn shortcuts and go through the menus and all of that yeah but there's some add-ons out there that try to streamline this process a bit more and just simplify it for you so for example instead of having to put many light sources in your scene manually you could just use hard ops as a tool and say please add five random light sources to my scene okay it does it for you okay if you don't like it can you just randomly change that again so you you can use a shuffle button uh shuffle exactly it's a shuffle button absolutely it's a shuffle button so there are tools out there to kind of speed up that workflow a little bit uh make it less frustrating
Sam Aldah: yes yeah yeah it does seem like uh it's you know blender seems like a tool that like oh you can build anything and whoa i want to do like one thing i want like the fastest path uh yeah yeah so that's great that sounds like a really a useful tool what about in the um you know so in a lot of these contexts i'm just pulling up one of the ones that you have a meandered inverted f antenna for far field right so you've you've simulated this it's awesome i think this is one of the first ones i saw from you um what so now when we start thinking about like what's uh happening in in over time so now there's a time aspect as well so how does that
Chris Gammell: start working in here uh so that's where then uh okay i i have my board in my scene and i've got the camera and i also you also have to um decide at which point you want to move your camera close to the pcb to then start the animation of the mat of the electric field so first of all i wanted to show the entire board as it is from from a distance okay and then i say to blender move in time two seconds forward and then in the in those two and then after those two seconds move the camera close to the to the to the pcb and close closer to the uh actual um uh antenna okay so um i then tell blender okay move two seconds in time forward and then move the camera close to the to the board and then get and then i move the camera closer to the antenna itself where i then start the animation for the uh for the wave so i've already have the data in blender but then i i say i then i say okay once i get the camera close to the antenna start playing that simulation data so then and then i show a little bit more and then i i sort of zoom back a little bit to show them the entire simulation result got it so i'm going to
Sam Aldah: say something that's very stupid now that should be obvious to people but since i i get to play the foil here on the amp hour uh yes often when i am rendering video for my own uses i am reminded that a computer or that a video is simply 30 frames of still images per second and yes i think that actually really helps to helps me to kind of like then think about like oh well we're moving through this video in time i have it like playing in super slow-mo here as sam and i are watching a screen share but like literally it's just slices of time and then it's like oh yeah like the the rendered you know visualization of an rf field is just you taking the slices of data like the the rf data that's overlaid on top of this in addition to the the 3d model and then just taking pictures in time like
Chris Gammell: that makes a lot of sense of course right yeah yeah of course you know the the the waves the dramatic waves they're much faster than what the video shows you know because the video shows the the waves going you know as they change within you know with time but that obviously the waves are much faster than this so yeah as you said as i said it's basically snapshots in time essentially yeah right and
Sam Aldah: and then so then again we're just going to describe the what we're what we're looking at here obviously an inverted f antenna is a pcb trace the rest of the board x is kind of the other half of the dipole right but the yes we're looking then at kind of reds and blues and kind of these gradients that are there yes that's the open ems data like what is the what is the reds and blues and rf kind of rendering
Chris Gammell: right yes so so this video shows two sets of two sets of uh simulation data superimposed on the first simulation result is the you see how the and the meandered antenna lights up in different
Sam Aldah: areas yeah it almost looks a little like uh blue dots almost and like as it yes changes there so these
Chris Gammell: are the actual electric fields that is propagating along the antenna itself and then those sort of gradients in space these are then the radiated electric fields and so the way i've done the color grading is that the the closer you are the antenna that's where you have the strongest electric field so it's dark and red and then becomes super really dark so it's very strong and then as you move away from it over distance it decays and becomes lighter blue lighter blue
Sam Aldah: got it yes and that and that is the output of open ems in this case or is that something else that is the
Chris Gammell: output of open yes it's actually the the data size is massive i bet yeah yeah you're probably rendering all the data that's in there right like yeah okay it is actually gigabytes of data uh you know being being visualized here uh of course the way blender does it is that you know every every frame it then reads the the simulation data for that specific frame imports it into blender processes it and then renders the result and then as it does that it moves to the next frame imports the data renders it and does the result
Sam Aldah: and the visualization so then do you have to like centralize so like uh open ems i imagine doesn't care where it is kind of in space and time so do you have to say like oh no it's it's centered on this antenna here like how do you how does it actually kind of physically correlate then ah so so and that's
Chris Gammell: where i actually use blender again to start with so i start i actually create the this antenna and this pcb geometry was actually designed in blender so then i i then export the i export blender to open ems so then i've got okay yeah and then that means when i then read the results back it's already sort of
Sam Aldah: in the right position let's say uh-huh yeah that makes sense then yeah that okay yeah yeah huh yeah because you know you'd mentioned on the kind of the prototyping element of the inductive side of things with your power work i would love to have you know i've often thought about putting you know these kind of antennas on boards like inverted f whatever they're they're in keycat at least and i do 2.4 gigahertz stuff sometimes but i'm always just like i don't know what it's going to do but i'd love to you know like if there was some like fast and natural way to do this and be like oh look i'm radiating from the wrong part of the board now because i you know that if that workflow is there i might feel more confident i probably still wouldn't do it but like you know like that the lack of of the you know it's all rules of thumb for me and i'm just like okay well i'm gonna do the my best shot and then hope hope for the best but mostly because it's not going through production if it was that that sort of thing where it was destined for production and and and i had these kind of tools available it's like oh maybe maybe there's more that i would be willing to do you know okay this is yeah this is very very
Chris Gammell: very cool yeah it was a very fun project i worked on yeah because like i said i've i've been doing power electronics for most of my my career and just now getting into the rf world and being able to visualize it all of these results really help helps a lot helps me and i was saying about the surface imperfections so if you if you if you're viewing the video you can see just next to the antenna there's some smudges on the board yeah it looks like uh there you go yeah like flux flux stains yeah stuff like it yeah like stains yeah which always is the case yeah yeah yeah that's great wow that is so
Sam Aldah: cool yeah i know i didn't notice when i was uh going through here as well like i saw some of the dots
Chris Gammell: that you had kind of have like the these little dots yes um i'm not sure about those i was trying to to kind of chat is sometimes you know if you're if you're in a room and you got a light source coming in you see dust particles floating in space yeah yeah yeah i was trying to replicate that but i don't
Sam Aldah: think it it looks too shiny and too sparkly but it looks like the the circuit is celebrating being being
Chris Gammell: yeah yeah that that i think if i would do that if i were to do this again i would definitely make some
Sam Aldah: changes i mean artists always always think they would change their past work but you know this is part of this is what two two years ago i mean think about how far you've come in just in two years so like yeah yeah yeah that's wild huh wow that is really really cool i mean uh so what about so just to just to stick on this example so you have an inverted f antenna here so that has uh you know an actual like copper element at the end how does how does that actually go into opening ms again like i i'm having never used it i don't actually get right how this would kind of interact like if that was a ceramic antenna instead what would have changed going into opening ms um what so so for this particular
Chris Gammell: design basically you have the layout and you've got the the geometry of the board so you export that as a stl file with the copper layout everything so you export all of that into open ems and with open e-s open e-m-s you say okay here is my stl file okay and then you have to define it with open ems the difficulty with it is doing the meshing you have to say okay please make my mesh dense in this location because that's where my antenna is so you need to spend a bit of time doing that but but yeah it's it's very it's it's it's and that's all there is to it you know you just have to tell open ems here's my stl file and here's where how the meshing i want it to be got it uh in this location probably if my my
Sam Aldah: my questions will be truly answered by going and trying it myself so it's probably the best the best advice but yeah this is very very cool uh let's let's look at some other ones so you've also kind of gotten like we mentioned the up into the um you know the gigahertz range does that yes appreciably change in terms of uh you know the frequency that you are doing when this happens like does does that matter much or or is it again just another open ems capability it doesn't really matter
Chris Gammell: i think you can go as high as you want but always comes down to uh obviously if you if you go up in the frequencies then that means you kind of need to make your geometry smaller and smaller and you need to kind of have better control on the meshing that you do uh for for for as you go up in frequencies because you know as you go up in frequency the wavelength is is very small talking about millimeters and so then you have to sort of define your meshing within a millimeter or less of a resolution uh you know like to get these sample points to be very very close to each other and so uh that's that's sort of
Sam Aldah: the meshing a little bit better i guess i don't quite understand the meshing aspect again it probably
Chris Gammell: takes it for me to go and do it but yeah meshing is basically uh so how these solvers work is that okay we have a geometry but we need to put in sample points so uh sample points in space so if i if i have for example a layout okay uh it's like a a to d converter okay i'm a digital converter yeah okay if you've got a sine wave yeah you know if you put more sample points on it then you can sort of almost get almost replicate that sine wave right okay yeah so but if you have less number of sample points you might end up with a square wave or something else yeah right right right yeah make question all that yeah exactly so it's a kind of a similar concept with meshing is that okay you have to define the number of sample points in space now in the example number of spots number of sample points in space to be able to kind of capture all the electric field everywhere and of course the more number of sample points you have the more processing you need to do and the more memory you need to do and at some point yeah you let your machine would just say no pass yeah okay yeah that's interesting yeah
Sam Aldah: i you know just as another call back to the episode with katarina too i remember when she was talking about like i i was confused about when she said talking about going into like an actual rf chamber and i was like well how do you how do you measure all this stuff in the real world then and she's like well no you're measuring it at single points in time because that's all we can actually measure is like what is the reading at a single point in time in terms of power or frequency or whatever or at a certain frequency what is the power so it sounds like maybe this is the similar way of you you have many many many many many many many many points in time and at different frequencies and so you're saying simulated here simulated here simulated here and then kind of stick it all together yes and then
Chris Gammell: we can yes exactly yeah so in this in these videos it's actually two separate simulations were done okay separately from independent from each other one one simulation was just simulating the the actual pcb layout and then the other simulation is okay um measuring and calculating the electric field that's been radiated in space so the two two separate simulations but yeah i just put them all together for
Sam Aldah: one full visualization very cool yeah i mean even just uh how you have the you know the sample uh 60 gigahertz yes like i know that those are like filters and that they have some impact on black magic yeah exactly it's just like i know there's physics in there somewhere what i really think about that was like okay what but if i actually wanted to implement this myself there's there is zero intuition on my part you know it's just it just squares on a page you know and it has some impact but i i don't know i don't get it
Chris Gammell: yeah yeah yeah yeah so yeah you definitely need a tool like this to actually you understand okay the waves are are being generated from the from the circuit from the integrated circuit okay and then they're traveling along the this transmission line but then they're they're they're hitting a stub along the way and then what happens is that okay when one wave reflects back some continue some reflect back and yeah it's just being able to visualize that and seeing it it just goes along it just helps you so much you know it's otherwise you're just relying on equations and graphs and charts and okay yeah
Sam Aldah: yeah exactly well and you also so you also have one where you you put a hand in there too
Chris Gammell: that's my favorite that's one of my favorite one and if you notice in the video at the beginning the tattoos i put on the hand let's see tattoos on the hand or the vault so this is something in in blender you can actually sculpt so imagine like in real world you've got a sculpture made of clay or stone and you can sort of move massager and move things and you can draw on it you can paint on it so same thing with blender it's actually a hand that i got i just got this model from somewhere on the web and i've sort of had to change the fingers and point them down so i wanted you know your index finger to be straight up and all the other fingers go down and i said okay i'm going to put a bit of something interesting because i i was listening to black sabbath ozzy osborne and i remembered he's
Sam Aldah: got tattoos on his knuckles so i thought i did the same thing nice i like it yeah that's great and i also
Chris Gammell: put because i put a bit of hair as well yeah i was looking at my hand okay i've got some hair on my fingers so i might just put that as well make it more real yeah and actually what
Sam Aldah: i'm really noticing about this is you also added surface textures to make it like more shiny like
Chris Gammell: a human skin it seems like exactly yes yeah perhaps i need to do a bit more more work on that to make it a bit more realistic because it's still it's still very it's still a bit a bit too shiny but yeah
Sam Aldah: i don't know it's like someone had just gone to the salon they had some skin yeah that sort of thing
Chris Gammell: yeah exactly at least the fingernails are you know good and yeah exactly yeah the manicure was done yeah yeah so there then in this one actually yeah okay so there's two simulations and you see you can see at some point in the video where i switch to the simulation of the field that's been generated and then that goes up to uh you know how the waves interact with a human hand and a finger for example and see some waves bouncing off and some waves traveling along the surface uh-huh and yeah it's
Sam Aldah: showing like the like the almost like a waterfall plot in 3d space to show the interactivity yeah because i mean that's another thing where i i have a i think a 26 gigahertz or like one of the the low cost sensors that's out there and it's like oh yeah we can read your heartbeat from across the room now yeah yeah excuse me like what but i guess it's just uh but detecting little vibrations in space and
Chris Gammell: then back calculating yeah exactly because yeah because you know you're working you know your your wavelength is in the millimeter range so you can now detect all of these small very very small changes
Sam Aldah: in the surface uh it's just amazing to me that how does anything work sam that's what i'm really gonna do you do this similar kind of work then for so like your your magnetic sorry your power charging stuff do you also simulate you know humans kind of in the loop as well because of how it might impact
Chris Gammell: yes so for for sort of um wireless charging and wireless power it's a low it's a much lower frequency now we're talking about anywhere between 100 200 kilohertz to a few megahertz megahertz region and so obviously in that scenario the wavelength is very very big and so it's because it's more of an of a near field sort of simulations you do um but then what's what's important is to do SAR simulation specific absorption rate uh you basically want to show if actually if you if a human gets too close to your wireless power coils how much heat do you generate in in human tissue oh and there's certain limitations and guidance about how much energy you can deposit in in a human limb or body and do do you deposit heat into humans that would be a bad thing right it would be it would be a bad thing actually as a matter of fact you know in force like your your your smartphone when you put it close to your ear so companies they do SAR simulations and they measure how much energy they're depositing in your head in your ear um and sort of this is what these professional tools allow you to do very very very good is that you can you can insert a human limb or head or hand and you can put your phone or your your your energy your source generator close to that and measure how much energy you're depositing so i think you're allowed to deposit two watts per cubic per cubic centimeter i believe no more than that over a six minute period that there are there are complicated regulations and
Sam Aldah: centers around that yeah yeah yeah and that's where all the the crazies think that we're you know being impacted by our phones but it's not an ionizing radiation yes exactly that's that's the thing folks yeah well just going up your uh other stuff here as well you have some pcb motors that's super cool as well
Chris Gammell: yes so this is a collaboration with carl uh carl he does um that's guest of the show carl bagager yeah yes yeah he was on the show uh and he he designs he he designs these uh pcb motors uh uh with pcb coils uh which uh which was really really really cool stuff he does i'm a big fan of him and i thought okay this is a perfect application for my so from my for my tools so okay he you know he's got his designs available on on github open so i you know i can i can download them and i can put them in blender i can do my surface imperfections and all of that lighting and um add other objects to the scene and then okay i can show the motor spinning and i can show also the magnetic field that has been generated by the pcb coils that he has in there yeah and vision and make all of that as a one visualization so okay first of all i'm showcasing the board and then i get close to the actual you know point of interest which is the motor okay the motor is spinning um and then okay the motor then you can see the screws come apart and it it leaves the scene exits the scene at some point and then that then shows the pcb coils which he's designed and then i use my electro mag tools to uh in blender to actually visualize the magnetic field lines that are being
Sam Aldah: generated by one coil yeah this is now switching to the magnetic domain obviously lower frequency that sort of thing yes how much when i guess when do you switch over from from the the power mag sorry the one
Chris Gammell: to the other i forget the name of them sorry oh yeah switch from electro mag nodes or from a a a near field sort of simulation to a far field simulation um it depends on who you ask everybody has different i would have a different answer i would say but in my case it would be um anywhere above 100 megahertz
Sam Aldah: i would say okay that's yeah that's a that's a good good general guidance i guess it's also what you care about too right if you care about like the actual like magnetic attraction of a coil might be different than or like power delivery from a coil which is probably in this similar sphere versus the interference effect you could probably still use it to see how this might interfere with your
Chris Gammell: you know if you had a radio nearby but blender sort of is this the hub it's a central hub you know for creating geometry for visualizing results trying quick concepts and just tying everything together
Sam Aldah: totally say yeah i'd say uh just to back to the education sphere as well like just the interaction you know like oh okay your perpendicular fields electric and magnetic fields are perpendicular blah blah blah it's just like what what do you mean like and then and then they go up to the board and they start holding their hands up again and they you know drawing x's and the o's into the board but man just this like i mean first off this is just cool by itself like seeing you know this is like uh you know watching how hollywood you know yeah renders this stuff as well that might be my go-to but this is an actual like modifiable and you know demonstrable thing that i could do potentially as well like
Chris Gammell: that's yeah that's where it really starts to come together exactly yeah you can modify it it's it's it's interactive as i said so if you make a quick change you see the result immediately change and and yeah i mean it's just all because you know we've got powerful computers these days and very fast
Sam Aldah: processing processors gpu so yeah you know um yeah and you have pretty much units on here as well so like just to to take it back to the the electronic sorry the the inductance stuff how does that tie back in
Chris Gammell: where you actually are calculating values that's where i'm now using blender's geometry node system so like i said it's like almost like simulink where i've actually done my own inductance calculator so it's so uh it it's blender is calculating the inductance of this coil within blender itself it's not using any external tools it the calculation is done internally um and like if you know the math behind it you know and be a savar's law and all of that you could sort of program all of those equations um in blender and and you could just do a quick calculation of the inductance and i've i've verified it's actually correct yeah yeah yeah yeah wow that is and that's that's the kind of stuff you said you
Sam Aldah: are you're doing professionally every day anyway so like it makes sense that you would yeah does it change with with like imposed voltages and stuff like that like it's showing it ticking up here but yeah
Chris Gammell: because the way it's calculating it is actually it's it scans the electric the magnetic field over over a certain area so it's scanning it and it's going to go up and up until but at some point it will stop um like that increase will then stop increasing anymore or so um it uh because sort of um i'm using air core coils so i'm not using ferrite material or other non-linear material so you could say it's the inductance is almost linear with voltage and current and pretty much stays constant if i were to have ferrite material then yeah it's it becomes a more complicated calculation got it okay oh and you
Sam Aldah: have a whole video on inductance calculator we'll put that into it okay great great i'm just dropping links in my notes here as we go along so this is good yeah okay wow that is and actually this is nice too i the thing that i like about this is that uh you know this calculating inductance it's actually showing your whole screen so as it's actually showing you working in blender which is really cool yes because that uh because i haven't tried it yet it's still kind of uh unknown to me but that's that's really
Chris Gammell: really important yeah i've realized that it's uh i get more interest in you know in me actually uh showing how i use blender and how i'm navigating around it instead of just showing the actual result itself so i i think i found that people like that more just showing how showing your your workflow and
Sam Aldah: what is it you're doing with blender yes yeah i mean because you know i can go to your github page and we'll put in the the very all there yeah the fast henry tools the electromagnet tools all those but it's different than actually seeing it happen right that yes the ability to be like oh i could go pause it if i need to and see what sam's doing on his screen like the the where do i click kind of piece of it all is also very yes exactly yeah so yeah that's that's really we will link in your youtube channel we will link in your art station channel which is another place you kind of highlight the yes the videos and the gifs of this sort of stuff that ends up on social what else should people check
Chris Gammell: out from your work i mean where um uh i think just uh showcasing products so recently the last one is i did this uh smart watch if you the first video on arts yeah that one there's zs watch open source smart watch so um this is an open source project and uh people they're doing you know they're doing your own smart watch uh it's a key cad project and i thought okay well i could experiment with that because i was uh and because i was trying to experiment with creating animations of how components of of fall on a pcb like sometimes you see these uh product demonstrations from apple samsung nvidia where they show how the components fall on a pcb and how everything is assembled and how all comes together so i was trying to kind of experiment with that a bit more and because all these animations of all these objects coming together is all actually programmable and scripted and so it's not me moving things manually with my with my mouse cursor i'm actually programming it all oh interesting yeah i mean that's
Sam Aldah: very useful i mean i can imagine every kickstarter campaign in the world wants this sort of with electronics going on this sort of thing yeah yeah yeah yeah yeah i mean exploded views are always fun and now this is like a it's like an inverse exploded view which is it's great yeah i shouldn't dig through every single video that's here that's that is for the audience to do but man i i want to uh that's very very cool one last thing i wanted to um to if we if a person listening wanted to fast track their learning what is your recommendation for the fastest way to get started doing this sort of thing
Chris Gammell: fast way is to start to learn to get to know how to use blender uh to get to understand how to work within blender how to move objects how to manipulate things i think and the best way to do that is just to uh go watch a youtube tutorial from blender guru i think that's the quickest and fastest way it's probably spend about three hours on it you'll be able to know how to get around blender how to do basic effects shading effects and all of that so oh that's the first thing i would step one is build a donut it sounds like build a donut yeah absolutely build your blender donut you know you could spend a day on it but that just covers everything and then after that okay like i said start from a reference design so perhaps if you're into electronics you're done a pcb get your key cad project your 3d board into blender straight away do that okay and then that at least that gives
Sam Aldah: you something to work with so find a key cad design on if you don't have one your own go find one start and then use the blender importer sounds like blender yeah you can export it blender blender
Chris Gammell: as a blender key cad add-on uh you can download it it's free and you can just get your project into blender and from there at least you've got something you can work with you can manipulate you can make changes and lighting material and i think that is the best way just to to to able to use blender and then then then you can take it a step further by going into geometry nodes into procedural modeling into then a bit of coding and then sort of getting actual simulation data into blender and all of that so three three three steps yeah i would say donut reference design and then go take it the next step with
Sam Aldah: geometry nodes okay what about when should people pull fast henry and uh the electromagnet nodes in like should they is that a a suitable third step or should they do the the geometries first i would say
Chris Gammell: that would be uh uh as a as a third step definitely i think that's a third step because yeah the those tools uh electromagnetic nodes and blender fast henry are you know you i'm assuming that the user already knows their way around blender knows the knows how to access things knows how to edit things um so yeah
Sam Aldah: i would i would recommend in sort of step number three i'm really asking for myself if it wasn't clear i am very selfish and i already have i don't know how to use blender yet so that's definitely the first step i have a keypad design i could pull that in i can share mine if people don't have one i have some open source hardware but there's lots of open source hardware in key cad which is great and if
Chris Gammell: people have any questions or any comments you can find me on social and just send me and send a message and and post a message somewhere and i'll try to help us as much as i can okay great that's a
Sam Aldah: that's how we always end so uh linkedin twitter slash x where should people find you everywhere um
Chris Gammell: if you search my name you can find me um i think my two most active places are recently i've been linked in and x you can find me on those two platforms um you can find me on youtube as well um so yeah just those three three sort of platforms that i'm currently very active on also you can post on the eev blog forum as well i've got a few posts on there okay great yeah well sam it has been an absolute pleasure
Sam Aldah: talking to you i am likewise i really enjoyed just i mean up until this point i've just loved looking at this stuff on on uh different different platforms but now you know you opening up you opening up the educational aspect of it too is going to be really enabling i think for a lot of folks so thank you thank you for being here thanks for your tools thank you very much my pleasure to be on the show thank you very much
Keep current
Every episode, plus the occasional job post, in your inbox.